|
In HS version 2.4, Control Panel interface design underwent significant modifications:
- New designs (skins), XPressia and XPressia Lite, were added,
with a dropdown menu panel on the top of the page.
XPressia Lite is specially designed to be used
if your browser works slowly with XPressia.
- The obsolete Text-Based skin was completely removed from CP interface.
- Instead of the Text-Based skin,
it is provided a possibility to choose the Text Links mode
from the Choose Iconset select box, with text-only links instead of icons
in the Quick Access page.
Note: If a user chose the Text-Based skin before HS update to 2.4,
this user's CP will appear in the Left Menu default H-Sphere skin after update.
If Text-Based was a default user CP skin,
it will be replaced with a new default interface skin set by administrator.
To select a skin and configure interface design settings:
Select Look and Feel in the Account menu.
The following page will appear:
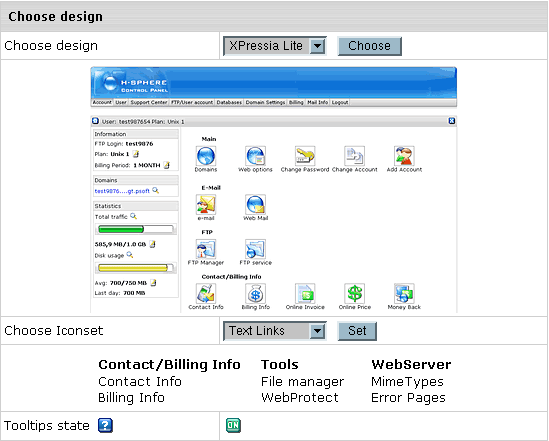
Select the name of a skin
in the Choose Design box. You will see the skin preview.
Click the Choose button.
Note: If your browser works slowly with XPressia,
choose XPressia Lite which is specially designed
for such situations.
Select an icon set in the Choose Icon Set box.
You will see the preview of images from this icon set.
Click the Set button.
Note: Choose the Text Links
mode if your browser is slow in drawing images.
Set Tooltips state. This option determines whether
or not to show hints at the top of each page.
|