|
This document describes the advanced plan controls.
However it is recommended to avoid using them, if the same task
can be done with the plan edit wizard.
To access plan controls, enter the admin Control Panel and go to
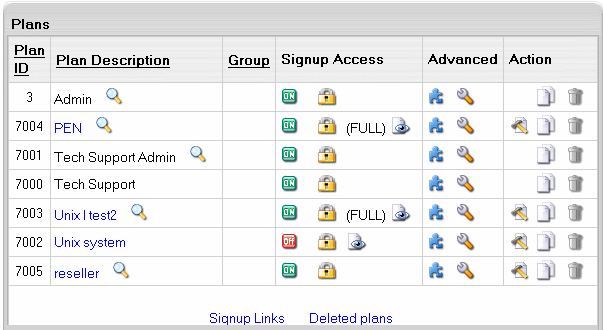
Info menu -> Plans. Here you can see a list of available
plans and multiple control options to handle the plans:

- ON/OFF icon: turn the plan ON to enable signup under the plan for all users
including admin. Turning it OFF will disable signup and with it all plan settings will be preserved.
- Access - set permissions
to create accounts under a plan for the users of other plans. FULL against the plan identifies that full access to this plan is granted.
- Settings -
configure template locations. This page is partly reserved
for H-Sphere development and should not be used in production control panels.
- Edit in the Action section - click to open the
Edit Plan wizard.
Show
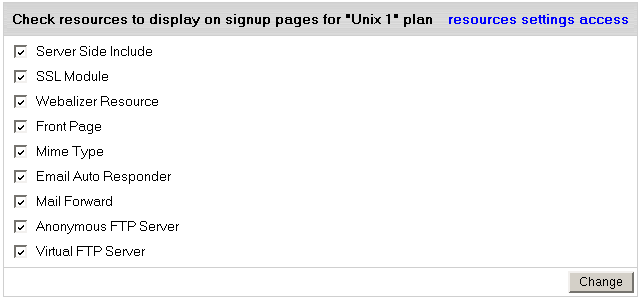
This pages shows all resources included into the plan in the
Plan Creation Wizard.
Here you can select resources that will show to users on signup wizard pages.

Simply check all necessary resources and click Change.
Resources
If you want to limit your users in using certain resources, you can use the Resources page
to set the maximum number of resource units a user can buy under this plan.
To set the maximum number of resource for a certain plan:
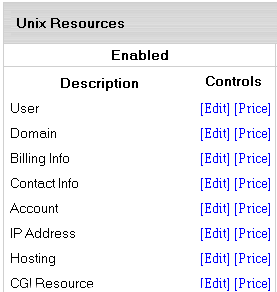
- On the Plans page click the Resources icon. The following page will appear:

- Click the Edit link to configure basic settings for resources:

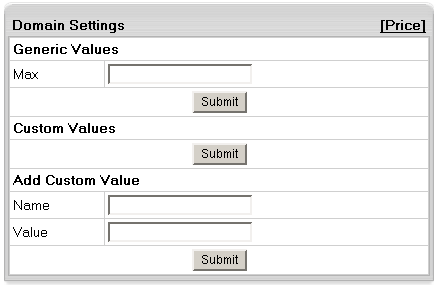
- Max: set the maximum number of resource units a
user can buy under this plan.
Note: as for IP, you can set the 'Max' value only to dedicated IPs.
- Custom Values: provide extra configuration parameters.
- Don't add custom values unless you definitely know how to use them.
Copy
Alternatively to the Plan Creation Wizard, you can use this
feature to create custom plans based on
the predefined plan samples.
To create a new plan, click Copy for the selected
plan sample. The newly created copy will appear in the plan
list. You can now modify it according to your needs via Plan
Edit Wizard or above discussed configuration tools.
Delete
Although deleting plans is quite a rare procedure (as plans
are essential part of the whole system), you may want to delete
needless or harshly created plans.
To delete a plan, click the Trash icon in the selected plan entry.
Warning: Deleted plans cannot be restored by any means!
Do not delete any of the system default plans because they serve to create custom plans!
It is impossible to delete a plan if there is at the least one account created under it.
In other words, you can delete only the plans without any accounts.
To see your deleted plans list, click the Deleted Plans link under the
System Plans chart on the Plans page, Info menu.
|