|
This document explains how to configure your control panel so
user homes under one reseller are created on a separate
physical server:
Step 1: Go to E.Manager -> Server Groups and
create new server groups for each type that will be created
on this reseller's box:
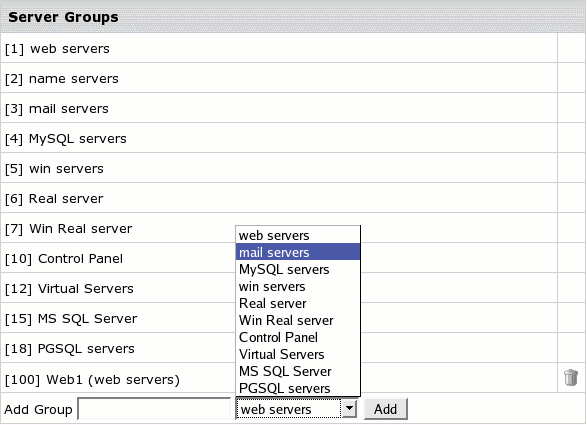
Usually, this would be a web server, sometimes a MySQL,
PostgreSQL, or RealMedia server. Make sure not to create
separate DNS server groups. When added, server groups
will show up in the numbered list.
Step 2: Go to E.Manager -> P.Servers.
Click the target physical server. At the bottom of the
page that appears, select a group you have created to add
to this physical server:
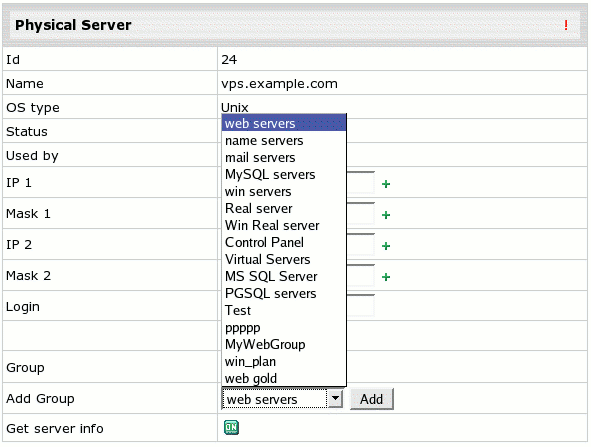
and click the Submit button. The name of the group
will appear in the Group field. Repeat this procedure
for each of the new server groups.
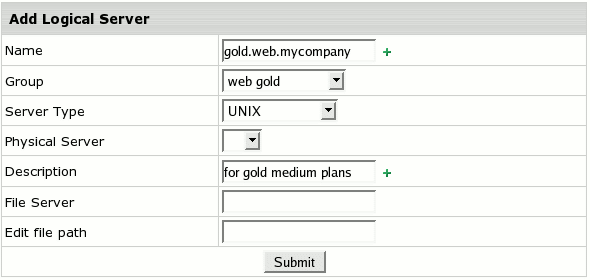
Step 3: Go to E.Manager -> L.Servers
and click Add Logical Server. Fill out the form that
appears to add a logical server to a new server group:
More on logical servers
Step 4: On the Logical Server settings page,
add the IPs that you want to use
for accounts registered on this logical server.
Step 5: In the upper part of the same Logical Server
settings page, turn on Available for signup.
Step 6: Repeat steps 3, 4 and 5 to add one logical
server to each new server group.
Mind, these settings will not affect existing end user accounts.
Only new accounts will be created on the designated server.
Step 8: If the reseller account hasn't been created yet,
go to INFO -> Plans and enable signup for this plan.
Then go to Signup and create the reseller account.
Step 9: Go to INFO -> Plans and turn
this reseller plan OFF for other signups.
|